Saturday, December 26, 2009

SNOW BALLS and PEANUT BUTTER BALLS!

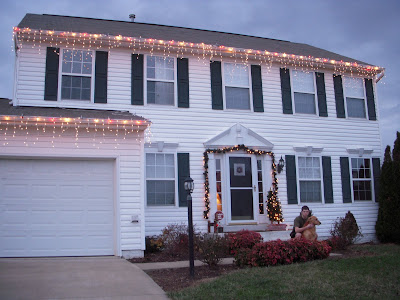
The Nor'easter hit us hard, but we loved every minute of it!


This was our first WHITE Christmas -Bryn's dream come true! The hot hot hot chocolate station kept our toes nice and warm. The best part for me was having all the extra hands I needed to roll the peanut butter balls. We added another ball this year...Oreo truffles. They were a hit!

Hope you had a ball this Christmas too!


Peanut Butter Balls

2 cubes butter-soft
1 1/2 package finely crushed graham crackers
1 pd. powdered sugar (1 box or 3 3/4 cups unsifted)
1 tsp pure vanilla
1 1/2 cup creamy peanut butter-I use Jif
2 bags milk chocolate chips - Guittard or Hershey are the best
1/8 of a parafin wax bar (optional)

Put graham crackers in a gallon size Ziploc bag. Use a rolling pin crush into fine crumbs. Pour into a large bowl and add the rest of the ingredients. Mix well. Form into 1 inch balls-place on a cookie sheet covered with wax paper, and put in the freezer to firm for about 20 to 30 minutes.

In a double broiler melt chocolate chips with 1/8 of a parafin wax bar. You don't have to use the wax. Dip ball and let set in the freezer. Store in Ziploc in the freezer.


Oreo Truffles

1 package Oreos
1 package cream cheese

Mix in a food processor or a mixer with the whipping hook, until mixture is completely creamed and no white remains. Form into balls and set in freezer. Follow dipping instructions for pb balls.

Tuesday, December 15, 2009

Home for the Holidays!

As promised, (Michelle, Zana and Deb) here are a few snippets of our Christmas in Virginia. The best part is that I only spent a few dollars this year to deck the halls! I'd like to thank Tai Pan and Roberts from years past, for helping me find cute Christmas decor that I could afford...Are you listening Virginia, I said cheap, but nooo, you don't understand that word do you? Why oh why did we have to pick the most expensive county in the country to live? If anything, it has helped me to tighten the belt around here and get busy in the kitchen trying to cut cost as much as possible. Although, lately I have become quite obsessed with making English Toffee. Is there anything better in the Christmas candy department then English Toffee? I don't think so! This is the best recipe I've ever tasted! I won't confess how many batches I've made this year that haven't made it out of the house to give to neighbors! The kids claw each other for the last piece! It's CRRAZZY over here!! The recipe takes about 10 minutes from start to finish. Be sure to make it when no one is around to distract you. You must give it your full 100% attention - If you do, it will bring joy to last the whole season through but, if you don't, it will bring angry, bitter tears knowing that you just wasted 3 cubes of butter! Good luck! Call me if you want me to make it with you! I promise not to eat it all.

*Recipe update-I recently bombed a batch of this and had to do some deep toffee soul searching! Come to find out I needed to change a few things. First, cook the toffee at a lower temperature-right below medium. Second, cook up to 290 degrees F. but no more then 300 F. And lastly, don't make the chocolate layer too thick or it won't stick. Hopefully, you won't waste as much butter as I have. But I still think it was worth it!
Best English Toffee

1 1/2 cups sugar
3 cubes REAL butter (I use salted butter-if you use unsalted add 1/2 tsp more of salt)
1/4 tsp salt
1 bag milk chocolate chips (Guittard is to die for)
or half milk and semi sweet-

Lightly butter a 9x13 pan.

In a heavy, good quality sauce pan, melt butter, sugar and salt over medium. With a wooden spoon or flat wire whisk, carefully stir ingredients until well incorporated. Place candy thermometer in on the side of the pan. Watch for any stray sugar granules on the side of pan. Wipe with a pastry brush to remove. Once the sugar is dissolved, this shouldn't be a problem.

From this point on, your not going to stop slowly stirring. After the mixture starts to boil, it will look creamy yellow. It's okay if the sugar and butter separate just keep stirring in a up and down motion, making sure your getting the sides. The mixture will start to look golden/tan keep stirring. It starts to heat fast, you want the color to turn to the color of a brown paper bag. Keep stirring so you don't scorch it. When the thermo. reaches between 290 to 300 F. Quickly remove and pour into prepared pan. Let toffee cool for 5 minutes, I usually wipe the top lightly with a paper towel to remove any oil from the surface so the chocolate will stick better. Let the toffee completely harden-you can speed it up in the freezer. In the mircowave, melt chocolate in 20 second intervals stirring after each time-then spread over toffee. You can sprinkle finely crushed walnuts or almonds over chocolate.

Let set for a few hours-or you can speed up the process in the fridge. When set, break into pieces and inhale.

Monday, December 7, 2009

Gingerbread Houses!

I was taught the art of gingerbread making 16 years ago, by my amazing friend Aimee. She was raised with a mother who would make gingerbread villages with stained glass windows lit up with a real light inside each house-and a lake for the gingerbread townsfolk to ice skate on! Truly magical! This is why I love this tradition so much, it unlocks our imaginations that have been in cold storage for a year! Since moving to a climate with high humidity, I've had to change the recipe to one that holds better--It's just not as good to eat. But really, who wants to eat 3 week old gingerbread anyway? I also changed to a royal icing made with meringue powder. It makes it easier to get the right consistency. It may seem a little daunting, but once you have a "good" experience making a homemade gingerbread house, you'll look forward to the fun next year--promise!

Gingerbread Cottage
Humidity proof recipe!

1 cup packed brown sugar
1 cup corn syrup
3/4 cup butter, cubed
5 cups flour
2 1/4 tsp cinnamon
1 1/2 tsp allspice
1/2 tsp salt

*1/2 cup crushed butterscotch candies (or any yellow candy) for windows. Place unwrapped candies in 2 gallon size Ziploc bags. Crush with a meat mallet (flat side). Get all those holiday stresses out!

In a medium size bowl, whisk together flour, spices, and salt. Set aside.

In a large pot, combine brown sugar, corn syrup, and butter. Cook and stir over medium heat until butter is melted. Remove from heat. Stir in flour mixture (it will be stiff) using you hands to mix it really well. Place dough in bowl and cover to keep from drying out. Let it cool in the fridge for 20 minutes.

Preheat oven to 350 degrees.

You'll need 2 large jelly roll pan. Turn pans upside down and spray lightly and evenly with cooking spray. Grab about half the dough and roll out to get an even surface a little less than 1/8 in. Trim with a pizza cutter any excess dough overlapping the edges.

Bake for 10 minutes. Remove from oven. Carefully place patterns on dough and with a sharp small knife cut out pattern. Remove excess dough. Finish baking for 5 more minutes or until edges are starting to lightly brown. Remove all pieces except window pieces.

Rip small pieces of foil, slightly larger than windows and spray with Pam. With a spatula, gently lift dough to place foil under windows (Pam side up). Spoon crushed candy evenly into windows and bake an additional 4 minutes or until candy has melted. Let cool then remove foil.

Allow gingerbread pieces to completely cool before you assemble house. I usually bake the day before I decorate. Royal Icing

3 level Tb Meringue Powder (you can purchase this at Walmart or Micheals)
4 cups sifted powdered sugar
6 Tb water--if you use a counter top mixer use 1 Tb less!
(I usually add more water a little at a time to get a glossy smooth paste)

Beat all ingreds. for about 5 min or until icing forms peaks.
Makes 3 cups. I usually double this when I make trees. Cover Icing with a damp cloth when not using - this keeps it from drying out. You can also store it in the fridge completely sealed, to use the next day.

To make trees, use ice cream sugar cones-upside down. Take out about 2 cups icing and mix in a few drops of green paste food coloring (Wilton) to get the right color of green.

Decorate each piece before you assemble the house-except for the roof. I glue gun the house together, (way easier) then cover with icing.

Decorating Ideas~
Mike and Ikes (red and yellow) for candles in windows.
Chocolate sticks for window flower boxes.
Red hots
M&Ms-red and green
Miniature candy canes
Star bright peppermints
Cherry sour balls
Pretzel rods-for log pile
Heart sprinkles
Mini tree sprinkles-use as leafs in flower boxes and wreaths.
Edible glitter-to make snow shimmer!
For the roof: Frosted Mini Wheats, Necos, Big Red gum (tiles) Let your imagination go! Happy gingerbread making!

This is Bryn's house - Looks like I'll be stealing some decorating ideas for my house next year! Way to CREATE Brynie!

Saturday, December 5, 2009

ROLL WITH IT ON YOUR ?TH B-DAY - MICHELLE!

I stole this recipe from Michelle 15 years ago, and have been enjoying the compliments I have been getting from it ever since! Thanks Michelle (again)! Actually I should be thanking her Mother, Roberta for giving birth to one of my dearest, funniest, and most youngest looking friends, ?? years ago TODAY! You heard it right people, it's the queen of cookin's Birthday today. No, not Paula Deen, I'm talking about Michelle, the cook that always has a perfect recipe idea to knock your socks off clear into the washer! She is always there for me in a recipe crunch, and I love her for it! I hope you have a wonderful Birthday Michelle! You deserve it! I am so blessed to call you friend -- speaking of calling, you better pick up the phone!


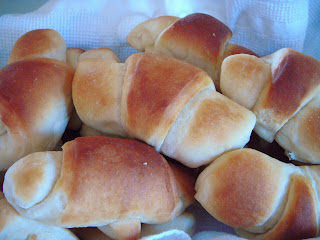
ROBERTA'S ROLLS

1/2 cup really warm water
1 Tb sugar
2 Tb active dry yeast

Mix this together in small bowl--set aside for at least 5 min. or until nice and foamy.

2 cups scalded milk
1 cube butter-cut into pieces
1/2 cup plus 2 Tb sugar
3 beaten eggs
2 tsp salt
7 1/4 cups flour (give or take)

In microwave scald milk for 3 to 5 min. Pour hot milk in your mixer attached with dough hook and add cut up butter. Allow butter to melt. Add sugar and beaten eggs and 2 cups flour, mix then add yeast mixture scraping the sides. Add 1 cup flour and salt mix, then gradually add additional flour. Total cups of flour about 7 1/2 cups. Beat until well incorporated. The dough will be pretty sticky. That's normal. If it looks a too soupy, sticky you can add no more than 1/2 cup to 1 cup more flour especially if you live in an area with high humidity.

Remove dough and place in a large well oiled bowl, cover and let rise 2 hours. If you have the time, you can add an extra hour.

Punch down dough and dump onto lightly floured counter. Prepare into desired roll shape. Lightly dust with flour when needed. Be careful not to add to much flour or your rolls won't turn out as light and fluffy as they should be.

Let rolls rise on pans until double in size. A good hour.

Bake at 420 degrees for 7-9 minutes. Or until they are nice and brown on top. The most important step is to brush each roll with melted butter after they are baked. Don't hold back!

*When I make cinnamon rolls I add about 1 1/2 more cups of flour until the dough is still sticky but the dough is starting to come off the sides of the mixing bowl. I'll post the cinnamon roll recipe later.


Wednesday, November 25, 2009

NOT YOUR TYPICAL GREEN BEAN CASSEROLE!

Zana called me this morning wanting this recipe. She will be in her lovely kitchen all day long, sweating over the stove, with flour and sugar flying through the air like pixie dust. Christmas music will be playing in the back ground, while her 4 girls will be decorating gingerbread houses and saying sweet nothings such as..."Mother, you are so bootiful with flour on your face!" Baby Thomas will be in his swing, perfectly content with a full belly of extra sweet milk (mom needs to find her energy somewhere)! And to top it off, the maid will be cleaning the kitchen during Zana's mid-day nap! We all know cooking and baking can really wipe you out!

That was my fun little day dream of Zana's life. You can call her if you want the REAL story! But I've gotta admit, it worked, I'm ready to get off my buns and get busy in the kitchen-Thanks Zana!

Favorite Holiday Green Bean Casserole

3/4 cup finely chopped onion
2 Tb butter
1 tsp salt
1/4 tsp pepper
1 tsp sugar
2 Tb flour
1 cup sour cream
4 cups french cut green beans-Canned or frozen
1/2 cup bread crumbs
2 Tb melted butter

Preheat oven to 350. In a skillet melt 2 Tb butter add onions and cook until onions are soft. Add flour (whisking) salt, sugar, and pepper. until combined. Stir in sour cream and green beans. Transfer to a baking dish. Mix crumbs and melted butter and evenly sprinkle over dish.

Bake for 25-30 minutes. Happy Thanksgiving!

Saturday, November 7, 2009

GRIN AND BEAR IT!


This was taken a few weeks after we moved here, and not much has changed in a year...the kids are still driving us and each other crazy! It was pointed out to us soon after Bryn was born that we had unintentionally made a statement in regards to our life and parenting...

Bryn and Garrett=Grin and Bear it!

This couldn't be more true, especially in the teenage years!! Don't get me wrong, they're still just as sweet and adorable as the day they were born, but that's only when they're asleep! No really, Garrett is still cracking us up, and Bryn thankfully is still a ray of sunshine around here, but she's only 11. I hope we have the same girl in 3 years! Who am I kidding, I have 4 sisters (although Zana has always been perfect)!

One of the many things I love about my kiddos is how they're always so grateful when I cook and bake. I love to make their favorite food and watch them turn to puddy in my hands!

They both share the same love for mashed potatoes, but I wouldn't make them as much because I don't really feel like gaining a pound after I have a bite or two. Thankfully I came across this recipe a few years ago and have been making it ever since. They never knew when I switched the recipe to the lower fat one, and they still comment that I make the best mashed potatoes! Let's get to smashing!


Low-fat Smashed Potatoes (As Zana's girls would say!)
Slightly tweaked from Cooks Illustrated

5 medium russet potatoes, washed,peeled, and cut into small pieces
3/4 cup milk--NOT nonfat!
2 Tb melted butter
1/4 cup low-fat sour cream
Ground pepper
Salt
Lawry's Garlic salt (optional)
Parsley flakes

In a large pot add potatoes and water to an inch above potatoes. Add 1 tsp salt and bring to a boil over high heat. Reduce to a simmer and cook for about 15 minutes or until tender and potato edges are soft and flaking off.

Drain and dump potatoes into your mixing bowl attached with a beater hook. Pulse a few times until they start to incorporate. Add milk, butter and pulse a more times until the lumps start to smooth out. Add sour cream and pulse to combine. Add salt and pepper to taste. I omit the salt if I use garlic salt and then sprinkle a little parsley. Be sure not to over mix or the potatoes will turn gummy.

Serve right away while it's hot to keep that perfect smooth texture!

Tuesday, November 3, 2009

I'm a Green Bean Eatin' Machine!

Michelle told me about this incredible recipe from Our Best Bites website. It sounded perfect for our Easter feast. I don't know why it's taken me so long to post this, but is a keeper! Never in my wildest food dreams would I think I'd crave green beans! It just goes to show you, life in the food blogging world just keeps getting better and better!

P.S. Those are caramelized red onions if your wondering...I know they look a little scary, but looks can be deceiving!

To Die for Green Beans!

1 1/8 pound green beans-washed, with ends snapped off and snapped in half.
1/2 pound bacon
1/2 red onion, sliced
4 garlic cloves, pressed
2 Tb soy sauce
2 Tb sugar
1/2 tsp kosher salt
freshly ground pepper
olive oil

In a small bowl combine soy sauce , sugar, salt. Set aside.

In a large pot bring water to a boil. Meanwhile, in a good sized frying pan cook the bacon. Remove from pan onto paper towels. Pour out bacon drippings from pan. When bacon is cooled, crumble into pieces.

When water is boiling, add green beans. Your just blanching them for a minute or two. Drain.

In the same pan you used for the bacon, add a little olive oil. When heated, add the sliced onions and pressed garlic. Saute for a minute-add the green beans, stir fry for a few minutes. Give the sauce a stir, then add to pan. Stir fry until the sauce starts to glaze and thicken. Add bacon and freshly ground pepper.

Wala! You just made yourself a killer side dish. Just remember to share!

Monday, October 19, 2009

Mmm... Berry Pie!


Here's another favorite Taste of Home recipe I've been making for what feels like 100 years! Dave would have me make this pie every week, but no, gotta keep 'em begging! The original name was Ozark Mountain Berry Pie-but we changed it to a more appropriate name and always sing our little song that goes with it.

Mmm Berry Pie Mmm Berry Pie, put it in the oven and it comes out hot! Can't get enough of that Mmm Berry pie... Thanks a lot!


Call me if you want to hear it in person!

Favorite Butter Pie Crust
Adapted from Martha Stewart

This pie crust can also be made using a food processor: Simply pulse in the butter for 8 to 10 seconds and add 1/4 to 1/2 cup ice water through the feed tube with the machine running.

Makes two 8- to 10-inch crusts
1 cup (about 2 sticks) cold butter
2 1/2 cups flour, plus more for rolling out dough
1 tsp salt
1 tsp sugar

Cut each stick of butter into eight pieces. Place the flour, salt, and sugar in a large mixing bowl, and mix to combine.
Add the chilled butter. Using a pastry blender, incorporate the butter into the flour mixture; the mixture should resemble coarse meal with small pieces of butter, the size of small peas, remaining visible.
Drizzle 2 tablespoons ice water over the flour-butter mixture, and blend. Repeat with an additional 2 tablespoons water. At this point, you may have to add more water: When a handful of dough squeezed together just holds its shape, you’ve added enough; if the dough crumbles, continue incorporating water, 1 tablespoon at a time, checking the consistency after each additional tablespoon.
Turn the dough out onto a clean work surface. Divide into two equal pieces, and place on two separate sheets of plastic wrap. Flatten, and form two disks. Wrap, and refrigerate at least 1 hour. I don't usually do this.

Berry Pie Filling:
1 1/4 cup sugar
1/4 cup plus 2 TB cornstarch
1/2 tsp cinnamon, optional
Dash salt
1/4 cup water
1 bag of frozen mixed berries
1 cup frozen blueberries
1 Tb fresh lemon juice
2 Tb butter

In a large saucepan, combine the sugar, cornstarch, cinnamon if desired, salt and water and lemon juice until smooth; add the fruit. Bring to a boil; cook (I mash up the strawberries a little) and stir for 2 minutes or until thickened. Set aside to cool slightly.

Line a 9-in. pie plate with bottom crust; trim pastry even with edge. Pour into pastry; dot with butter. Roll out remaining pastry. Trim, seal and flute edges. Pour 2 Tb 1 % or higher milk in bowl. With pastry brush, spread milk across crust. You just want the surface wet. Lightly sprinkle sugar over entire crust. Cut a few slits in the top crust and bake at 400° for 10 minutes. Reduce heat to 350°; bake for 45-50 minutes or until the crust is golden brown and filling is bubbly. Cool on a wire rack. Store in the refrigerator. Serve with vanilla bean ice cream. Mmmm Good!

Wednesday, October 7, 2009

GORGONZOLA PENNE with CHICKEN - Taste of Home Grand Prize Winner!

You can always trust a Grand Prize recipe from Taste of Home. We served this to guests and got rave reviews! It was easy and impressive-like a fancy Italian restaurant.
Bon Appetit!

Gorgonzola Penne with Chicken

Ingredients
1 package (16 ounces) penne pasta
1 pound boneless skinless chicken breasts, cut into 1/2-inch pieces
1 tablespoon olive oil
1 large garlic clove, minced
1/4 cup white wine
1 cup heavy whipping cream
1/4 cup chicken broth
2 cups (8 ounces) crumbled Gorgonzola cheese
6 to 8 fresh sage leaves, thinly sliced
Salt and pepper to taste
Grated Parmigiano-Reggiano cheese and minced fresh parsley

Directions:

Cook pasta according to package directions.

Meanwhile, in a large skillet over medium heat, brown chicken in oil on all sides. Add garlic; cook 1 minute longer. Add wine, stirring to loosen browned bits from pan.
Add cream and broth; cook until sauce is slightly thickened and chicken is no longer pink. Stir in the Gorgonzola cheese, sage, salt and pepper; cook just until cheese is melted.

Drain pasta; toss with sauce. Sprinkle with Parmigiano-Reggiano cheese and parsley.
Feeds about 8 happy guests.

Monday, September 28, 2009

Where have you been...Mexican Lasagna?!

I'M HOME! I still have more boxes to unpack and pictures looking for a place on the wall, but all I can say is I finally feel at home here in VA! We are still renting (which was not in the plans) and I'm surprised that I'm okay with it. All I know is this is the perfect house for our little family right now. The last home was quaint, but after the basement flooding numerous times, and the mold problem and the bugs and the...well you get the picture. Anyway, I'm back with a smaller kitchen, but a happier heart! I'm more determined than ever to get my recipes posted and soak up the beautiful life I've been blessed with here in Virginia!

Here's a favorite recipe I thought I lost in the move. It surfaced after I emptied a box from the garage! Do you see why I need to get my recipes organized!


MEXICAN LASAGNA


1 pound 85 % ground beef (I never use this, it still taste great without it).
1 onion-chopped
1 Tb veg. oil
2 Tb chili powder (I use 1 1/2)
1 tsp cumin
2 t sugar
1 tsp salt
1/2 c water
2 garlic cloves-minced
1 small can tomato sauce
1 can cream of chicken soup (Healthy Request)
1 cup light sour cream
1 can sweet corn-drained
1 can black beans-drained
1 can pinto beans-drained
1 package burrito size flour tortillas
4 cups shredded Colby- jack or Mexican cheese
1/2 cup chopped cilantro

In a skillet, saute onion in oil until tender-then add the rest of seasonings up to garlic-saute 30 seconds and add tomato sauce, cream of chicken, and water stir and cook until heated through. Set aside.

If using beef, cook in a separate skillet over med-high heat until no longer pink, about 5 min. Drain in colander, and transfer into a med. size bowl-
Add the corn and beans.

Assemble:

Lightly spray a 9x13 pan. Arrange about 2 tortillas in the bottom of pan. Evenly sprinkle with half of the bean mixture then pour about 1 1/4 cups sauce over beans and spread to evenly distribute. Sprinkle 1 1/4 cups of cheese over mixture. Layer 2 more tortillas then beans and 1 1/4 cups sauce and cheese, top with more tortillas and add the rest of sauce evenly over the top and sprinkle with cheese and cilantro. Bake at 350 degrees until cheese is melted and slightly browned, about 25 minutes.

Top with pico, or whatever floats your boat!

Monday, August 24, 2009

Peaches 'n Cream Pie!

"I've always wanted peaches 'n cream skin, maybe if I eat more of this pie, it might help." This is what I say to myself every time I come face to face with this divine creation!
Michelle introduced me to this pie years ago, and I've been gushing about it ever since! I can't resist making it a number of times during the peach season, hence, the reason I find myself making excuses to eat more of it! Good luck resisting this one!

COOKIE PAT CRUST

1 cup flour
1/2 cup butter-melted
2 Tb sugar

In bowl, combine ingredients together and pat evenly into pie pan. My pie dish is 9 1/2 inches so the dough doesn't reach all the way to the top. Bake at 350 degrees for about 15 minutes or until just starting to lightly brown. Let cool. I usually make the crust the night before.

FILLING

1 cup sugar (I used 3/4 cup)
3 Tb peach jell-o
4 Tb cornstarch
1 cup water
juice of 1/2 lime or 1/4 lemon

In saucepan whisk together the first 3 ingreds. Add water and lime juice and cook over medium/high heat, stirring constantly until mixture is gel like and clear. About 5 min. Remove from and and cool. I put the pan in a big bowl of ice water to cool faster.

BLANCHING THE PEACHES
For easy peeling!

5 large ripe peaches

Fill a large pot with water and bring to a boil. Add peaches-carefully remove after a few minutes and peel off skins. Slice peaches-med. thin.

CREAM LAYER

4 oz cream cheese (room temp)
1/2 cup powdered sugar

In small bowl combine. Spread in the bottom of cooled pastry shell. Next, layer the peach slices and pour gel mixture evenly over peaches. I don't use all the gel mixture it makes a little too much, I pull out about a heaping 1/4 cup. Chill pie for 2 hours.

Top pie with freshly whipped cream, sweetened to your liking, and 1/2 cup lightly toasted chopped pecans (optional).

Tuesday, August 11, 2009

Turkey Sliders...it's what's for dinner!


The picture isn't great, but the meal was! The whole fam gave this one a ten! It's not your typical burger-this one has a little flare to it. If you love basil and feta, you'll be in burger heaven!


Turkey Sliders

1 package Pepperidge Farm Slider buns
1 package-about 1.20 pounds lean ground turkey (I used 7% fat)
2/3 cup crumbled feta
1 Tb fresh basil-chopped
(I use Gourmet Garden pictured above. You can find it in the produce section. I freeze it and when I need it for a recipe I let it sit out for about 10 min. to slightly thaw. It's as good as fresh and never goes bad!)
1/4 heaping tsp sea salt
1/4 scant tsp freshly ground pepper

In a bowl, mush ingreds. together with your hands. Be careful not to over mix-it will make them tough. Form into patties -shape and size to your liking. Just remember they shrink considerably! Throw them on whatever grill you've got. I used my electric grill.

These toppings really make these sliders divine!

-Sliced cucumbers-it really adds a nice crunch and flavor!
-Thinly sliced red onions
-Ranch Dressing-I used Hidden Valley Light.
I'm gonna go wipe my mouth from all the excess drooling...excuse me!

Tuesday, July 28, 2009

Zucchini Zucchini Zucchini!

Say zucchini over and over again really fast...it starts to sound like skinny-funny, huh? Anyway, it's that time of year when zucchini is coming out of our ears! But I don't mind, I truly love this vegetable. So many things to make with it, and so little time before it starts to rot!
Here's my wanna make zucchini recipe list for this season:

-Lora's Zucchini Soup
-Shanadee's Chocolate Zucchini Bread
-Taste of Home's Zucchini Chicken Pasta
-Pioneer Woman's Zucchini Fritters
-and last but not least, find a killer Fried Zucchini recipe-like the one I had when I was 10 years old, I haven't found one as good since! Laura, you're the only one who really understands this! You were at the restaurant with me and we both know we haven't been the same since!


Zucchini Cupcakes with Brown Sugar Frosting
adapted from Taste of Home-makes 2 dozen

Preheat oven to 350 degrees-place cupcake liners in 2 muffin pans.

3 eggs
1 1/3 cup sugar
1/2 cup oil
1/2 cup orange juice
1 tsp almond extract-optional
2 1/2 cup flour
2 tsp cinnamon
2 tsp baking powder
1 tsp baking soda
1 tsp salt
1/2 tsp ground cloves
1 1/2 cup finely grated zucchini

In a med. size bowl beat eggs-add sugar, oil, oj, and extract. Mix well. In another bowl whisk all dry ingreds. and add to egg mixture stirring well to combine-fold in zucchini.

Add filling to muffin pans. Fill 3/4 full in each cup. Bake for 20 minutes. Cool.

Brown Sugar Frosting

1 cup brown sugar
1/2 cup butter-room temp.
1/4 cup milk
1 tsp vanilla
2 cups powdered sugar

In a saucepan combine brown sugar, butter, and milk. Bring to a boil over med. heat-cook and stir for 2 minutes. Remove from heat-add vanilla and whisk in powdered sugar until it's nice and smooth. It will be sort of runny. Kindof in between a glaze and frosting. Frost cupcakes right away or frosting will start to harden.

Monday, July 20, 2009

A CAPITOL FOURTH!

Our good friends, the Thompsons came for a visit in the beginning of July. They were here for 2 short weeks and still didn't get in all the sites! They were our own personal tour guides (they did a short internship here years ago) and helped us appreciate even more how amazing it is to live in an area full of such rich history! We are now seasoned tour guides and ready to take reservations for anyone willing to blow their budget and come for a visit! We promise we won't get lost on your guided tour because we will soon be equipped with a GPS system, a necessity (we've now learned) for these parts! Just be prepared to gain at least 5 pounds, because I really like to feed my guests good! There's a lot of walking, so you can walk it off as you go! Just get ready for a finger lickin' site seein' good time! Anyone...anyone? Maybe this will entice you...

This is Aimee's 4th of July tradition - I always feel like the biggest copycat around her, but I don't care because this is the best fruit pizza I've ever had! She adds a little gourmet splash at the end, and drizzles raspberry sauce over each slice! To die for! It was such a hit, we had to make another one!

STAR SPANGLED FRUIT PIZZA
adapted from Aimee

1 cup butter - room temp.
1 cup powdered sugar
1/3 cup sugar
1 egg
2 1/2 cups flour
2 1/2 tsp baking soda
2 1/2 tsp cream of tartar
1/2 tsp pure vanilla
1/4 tsp almond extract - optional - I don't care much for it-I know, I'm not normal!

In a mixer cream butter and sugars, add egg and vanilla mixing to combine. Add the additional ingredients, mix well-it will be sticky. Patiently :) spread mixture evenly into a lightly sprayed rimmed cookie sheet.

Bake @ 325 Degrees for 12-15 minutes-don't over bake! The top should be just starting to brown. Let cool completely.

FROSTING

1 1/2 blocks (12 oz) cream cheese
1 cup powdered sugar
1 1/4 tsp pure vanilla

In a mixer, mix until nice and creamy and spread over cooled cookie.

RASPBERRY SAUCE

1 small container of frozen SWEETENED raspberries (in freezer section by the frozen fruit)
Puree in a blender or food processor. Drizzle over each slice! This really makes it!!!!

Thursday, July 9, 2009

Summer Sandwich Lovin...Happened So Fast!

Meet my sister Zana, her tummy, and a yummy sandwich!
(That's Zana's shirt, not her skin :)

This is the perfect sandwich to shake you out of the same ol' sandwich blahs! Don't get scared when you read the ingredients. I personally have never bought Russian dressing in my life, but it seriously makes the sandwich. I've served it to family, friends and an unborn baby boy, and they all agree, this is the perfect summer sandwich!

Turkey Coleslaw Sandwich

6 Kaiser Rolls
1/2 lb Oven Roasted shaved turkey from the Deli
6 slices Havarti cheese
Russian Dressing-I used Ken's Steakhouse, it looked the creamiest (If you can't find creamy Russian Dressing, use a good quality Thousand Island-I hear they're pretty similar:)
1 bag of shredded cabbage - recipe follows

In a medium bowl empty the bag of shredded cabbage - add 3 Tb sugar, 1 Tb apple cider vinegar, and 1/3 cup mayonnaise (I use light). Toss well to combine.

Lightly butter rolls and broil until lightly browned.

To assemble sandwiches, spread a thick layer of coleslaw then the turkey and a slice of cheese. On the top bun, spread a generous amount of Russian dressing. Happy Summer Eating!

Friday, June 19, 2009

IMPRESS THE GUEST CHICKEN!


My friend Michelle and I have been exchanging our favorite recipes for years. She gave me this one awhile ago and said her classic statement along with it, "Make this, you'll love it - trust me!". I hesitated because it called for honey mustard sauce, and I don't care too much for mustard. I finally gave in a few weeks ago and have made it twice since! That says it all! This is one of my new FAVORITE chicken dishes! As for the honey mustard sauce well, all I can say is...come to mama! SOOO GOOD! You want to impress your guests? Make this, you'll love it - TRUST ME!

Honey Mustard Chicken
a.k.a Aussie Chicken from Outback Steakhouse

Honey Mustard Sauce

1/4 cup regular mustard
1/2 cup honey
1/4 cup mayonnaise
1/4 cup light corn syrup-I used only 2 Tb
1 Tb dried minced onions-I used reg. minced onions lightly sauteed in butter.

In a small saucepan whisk together all ingredients. Heat to a simmer. Take off heat and set aside.

Next you'll need:

6 pieces of thickly sliced bacon-cooked
6 chicken breasts-thawed
1 reg. sized container of sliced small White butter mushrooms(I lightly saute them in butter, Michelle doesn't, so you choose!)
6 med-thick slices of Colby Jack cheese or one 1/2 pound package grated
Lawry's Seasoned Salt

Preheat oven to 350 degrees.

Place chicken on counter and cover with plastic wrap. Pound each breast to an equal height, about 1/2". Dry each piece of chicken with paper towels-you want them really dry. Heat up your non-stick skillet to med high heat. Lightly sprinkle both sides of each breast with seasoned salt. Lightly cook chicken a few minutes on each side. You want the middle to be a little pink. Transfer chicken to a sprayed 9x13 pan. Lightly drizzle each piece with a little sauce. Break 1 slice of bacon in half and place on each piece of chicken. Evenly dump mushrooms over chicken and top with the cheese.

Place in oven and cook until cheese is melted and chicken is cooked. About 15 minutes. When serving pour more sauce over chicken and put the left over in a gravy boat. Try not to hog the sauce, or your guests will get annoyed! Unfortunately, I know this from experience! This dish goes perfect with garlic mashed potatoes! ENJOY!

Tuesday, June 2, 2009

Oh, the Many Possibilities of Meatballs!


This meatball goes great with any recipe. From spaghetti to Swedish meatballs-you can't go wrong! I always double the batch, then freeze them. Makes tons! I can get about 3 to 4 dinners out of it!

Favorite Meatballs-

Panade(the glue that holds them together)

1/4 cup bread crumbs or 1 slice good quality white bread, crust cut off, torn into small pieces.
1 egg, lightly beaten
1/4 cup half & half

In a small bowl combine above ingredients. Mix well-set aside.

1 pound Jimmy Dean Sage Sausage-use the Mild flavor if you don't like a slight kick!
1 pound lean ground beef
1/4 cup grated yellow onion
1/2 tsp garlic powder
1 tsp salt
1/8 tsp pepper
3/4 tsp baking POWDER

In your Kitchenaid bowl, beat together the panade mixture, the pork and all seasonings until well combined. With the dough hook, mix in ground beef until just combined. Don't over mix this part, or meat will turn out too tough!

Shape the mixture into 1 1/2-inch balls. Keep a small bowl of water nearby to keep you hands wet while doing this. It helps keeps the meat from sticking to your hands.

Place on rimmed cookie sheet. Bake at 410 degrees for 18-20 minutes. Be careful not to over cook!

Some of my favorite recipes to go with these...coming soon!

Fast Broiled Broccoli, and I mean FAST!

We love broccoli at our house, but I can't stand the smell that lingers around the WHOLE house after I steam it! This method of cooking keeps "that" smell contained pretty much. It's done just like the fast broiled asparagus. I buy the big bag of fresh broccoli from Costco. It's amazing how fast we go through it! Now I can eat my broc and not have my house smell like fungus mungus anymore!

Fast Broiled Broccoli-

Broccoli florets-cut into uniform pieces
olive oil
kosher flake salt

In a bowl add broccoli. Slowly drizzle a small amount of olive oil over and toss. Be careful not to add too much oil! Sprinkle with salt to taste. Spread on cookie sheet and place on top rack in oven. Broil for 2 to 3 minutes. They're done, you're done!

Tuesday, May 26, 2009

Bringing the Cafe Home!

Summer's here, and my sandwich/salad craving has kicked into full gear! My mom and I had the pleasure of visiting some local cafe/bakeries around my neck of the woods, when she came for a visit this past week. We came across some real winner's that I can't wait to copy. Ironically, my sweet sister in law emailed me this panini she enjoyed at a local cafe in her area, and thought I'd enjoy it also! My only words are...Ti Amo Panini! Lora, you've got taste! Thanks for sharing! Now I have to add a panini maker to my kitchen appliance wish list! But for now, my homemade version will have to do.

Grilled Asparagus and Tomato Panini~

High quality sourdough or Italian pane bread, lightly buttered
Provolone cheese
5-6 asparagus-fast broiled method under veggie post.
2 thick slices tomatoes, lightly salted and peppered
Shredded mozzarella
Lawry's garlic salt

On a heated skillet place a slice of bread, buttered side down. Cover with provolone cheese. Next, layer asparagus then tomatoes. Lightly sprinkle with garlic salt and cover with shredded mozzarella. Top with buttered bread. Grill until golden and cheese is melted.

Think of Lora (sorry, to get that song stuck in your head now) when you realize this is one of your new favorite sandwiches!